How To Backup Your WordPress Website (Step-By-Step Guide)
It is difficult to recover a website if you do not have a functional backup, so in this post I want to share with you how you can easily create backups for your WordPress website.
This way, you can have peace of mind even if your site gets hacked or encounter malfunctioning errors down the road because it can be recovered easily using your own backup files!
Our step by step guide below will teach you how to automate daily backups for your WordPress website and have the files automatically uploaded to your Dropbox account.
Important Tips For Business Owners
Before we dive into the steps, it is important for you to understand what a complete WordPress backup consists of.
There are two components in a complete WordPress backup:
- The files (most likely in zip format), and
- The database file (.sql).
Please understand that your backup copy can only be used when it has both the files and the database file. If you only have one but not the other, it will not be possible to restore your website.
So if you already have existing backup(s) of your website, do check that it contains both the files and the database file. If either one is missing, it would be best for you to follow the steps in the next section to do a complete backup of your website.
Some business owners also tell us that their hosting company performs regular backups for them, so why is there a need to do your own backup?
The thing is, most hosting companies only keep one copy of your website at any one time. In other words, every day, they will replace yesterday’s backup with today’s one.
In the event that your website was hacked two days ago and you only discovered it today, the latest backup copy that your hosting company has (which is today’s version) will be rendered useless since it is also the hacked version – this has happened many times based on the inquiries that we received.
Thus the practical solution to avoid such tricky situations is to do your own backup. We’d encourage you to save up to 7 days of backups in your own storage so that you can retrieve them easily when needed.
All it takes is a simple one-time setup process by following our step by step guide below and the best of all, there are no fees involved.
Step-By-Step Guide: How To Backup Your WordPress Website
First things first – you need to check that you have administrator access to your WordPress website.
You can find out by logging into your WordPress dashboard (if your website domain is xxx.com, your login URL will most likely be xxx.com/wp-admin).
Once you are logged in, go to Users >> All Users and you will see the screen below.
Click the ‘Administrator’ link at the top and check if your user is listed as ‘Administrator’ under the Role column.

If you are the administrator, great! You can proceed on with the next step.
If you are not, you will need to contact your web developer/designer to get the administrator login because only administrators have full access to perform the steps below.
Step 1: Install Plugin – UpdraftPlus
Once you’ve confirmed that your WordPress account has administrator level access, the next step is to install a plugin called UpdraftPlus. This plugin will help you to backup your website automatically.
Go to Plugins >> Add New.
When you’re on the following screen, enter ‘updraftplus’ in the search box. Then click the ‘Install Now’ button as shown.

After the installation process is complete, the button will change from ‘Install Now’ to ‘Activate’.
Click the ‘Activate’ button to activate the plugin.
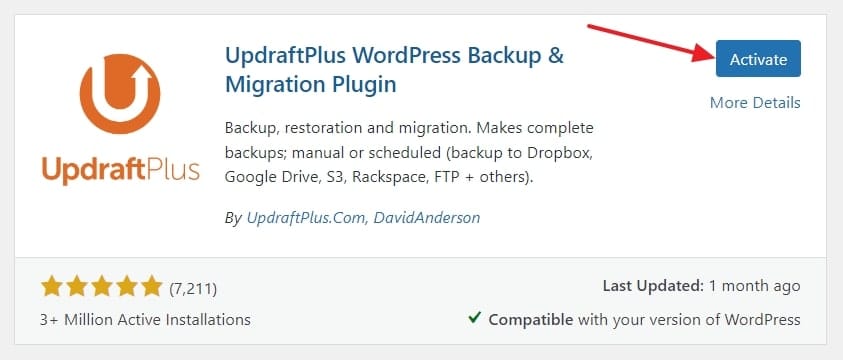
Don’t forget to click Activate after the plugin has been installed!
Step 2: Configure Plugin
After the plugin is activated, you will be redirected to a page that lists down all the plugins that you have on your website (including the newly installed UpdraftPlus).
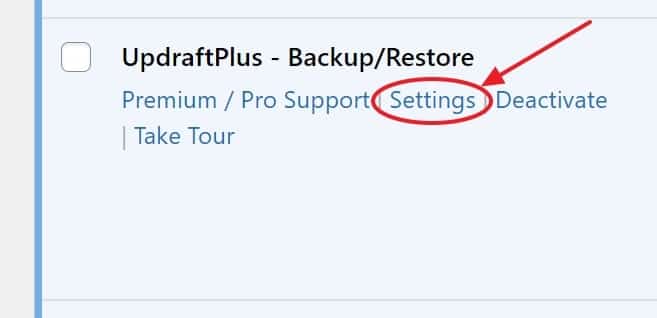
Scroll down the page until you find the UpdraftPlus plugin, then click on the ‘Settings’ link as shown below.
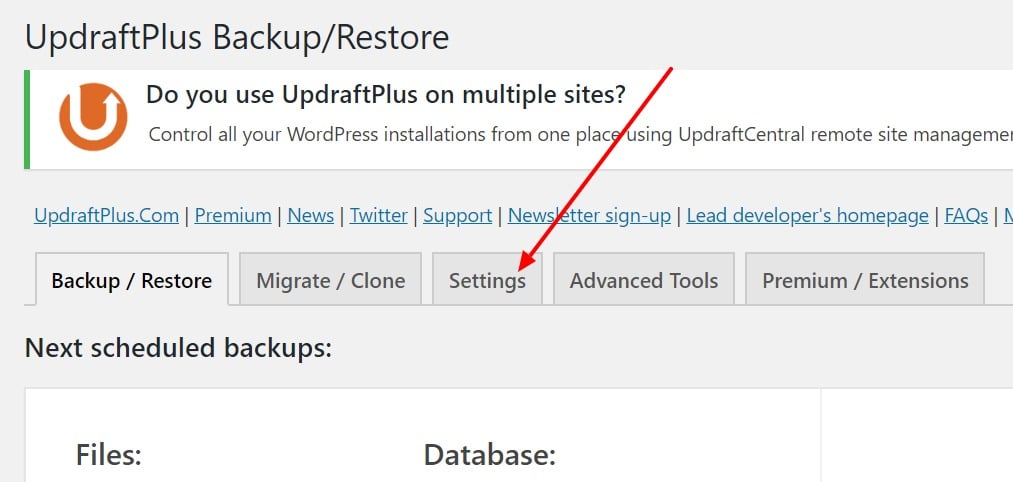
When you are on the UpdraftPlus page, click on the ‘Settings’ tab as shown below.
From here on, we will start to configure important settings in order for your backups to work smoothly, so please stay with me closely (it will definitely be worth your time)!
I will only be covering specific settings that need to be updated/changed.
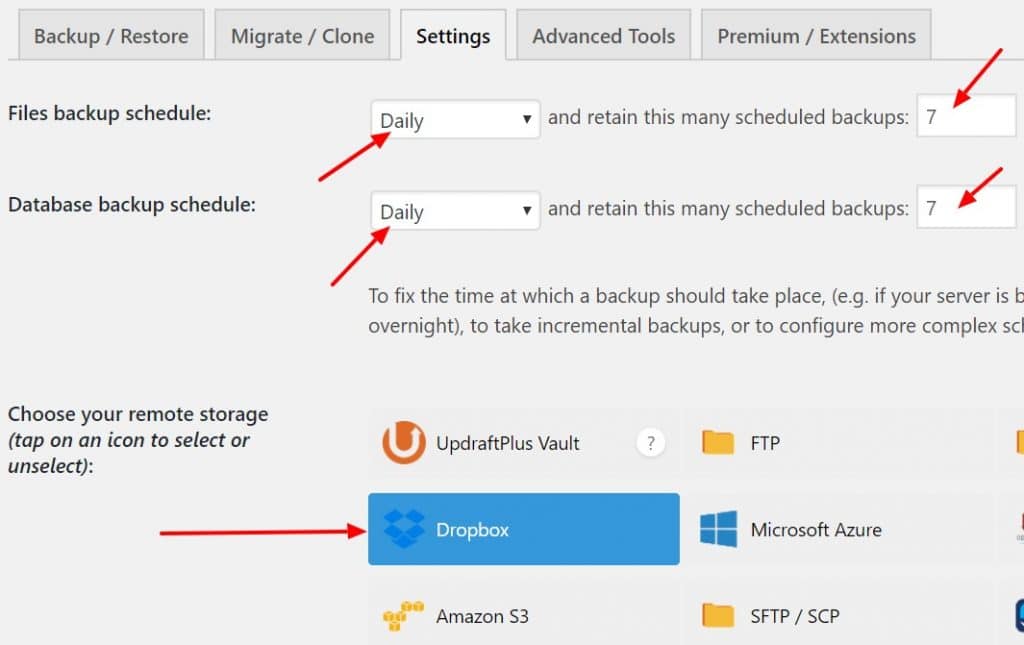
First, set the ‘Files backup schedule’ and ‘Database backup schedule’ to ‘Daily’, and input ‘retain this many scheduled backups’ as ‘7’.
These settings will instruct the plugin to automatically backup your website files and database every day, and it will also keep the latest backup files for the last 7 days (in other words when it hits the 8th copy, it will start to delete the oldest copy).
The next setting is to select your storage option. I’d recommend Dropbox as many people are Dropbox users and it is the most straightforward option. So click on the ‘Dropbox’ icon and scroll down.
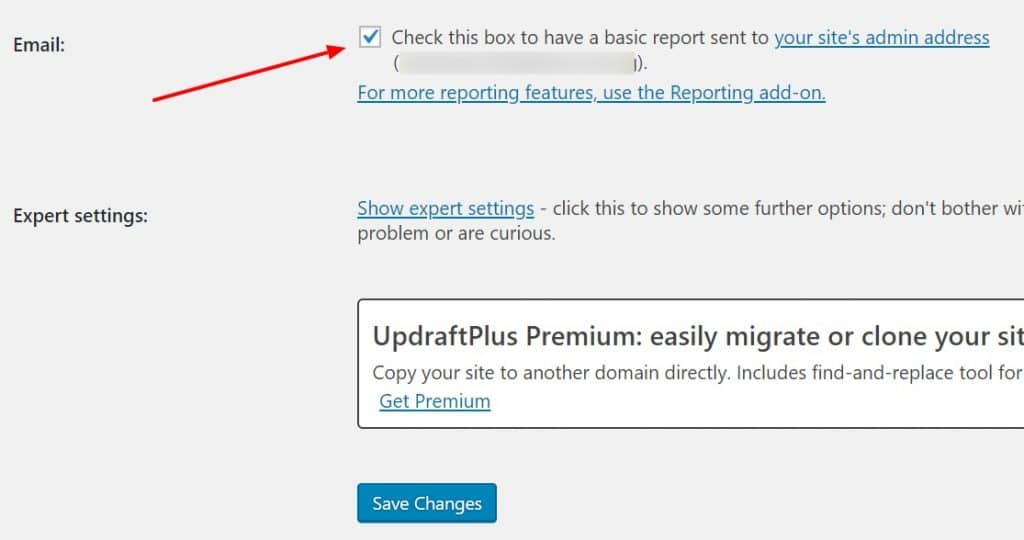
At the bottom part of the page, enable the ‘Email’ checkbox so that the plugin will send a basic backup report to your email.
Then click the ‘Save Changes’ button (leave all other settings as default).
Once the settings are successfully saved, you will be prompted to link up your Dropbox account so that it can authorize UpdraftPlus for future storage. The screen looks like the following:
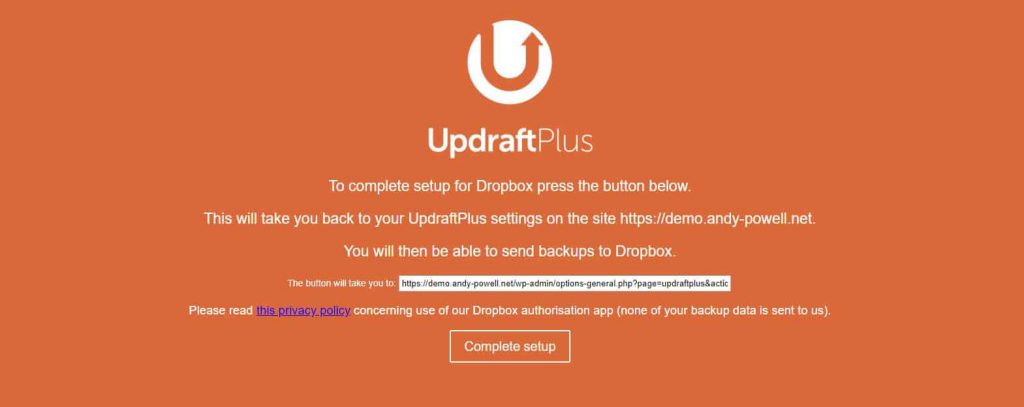
Go ahead and click the ‘Complete setup’ button. Then follow the onscreen instructions to enter your Dropbox login details and link your Dropbox account to your WordPress website.
Step 3: Start Your First Backup
After the authorization is completed, we are now ready to run your first backup!
Go back to your WordPress dashboard. On the UpdraftPlus settings page (under the ‘Backup / Restore’ tab), click the ‘Backup Now’ button as shown below.
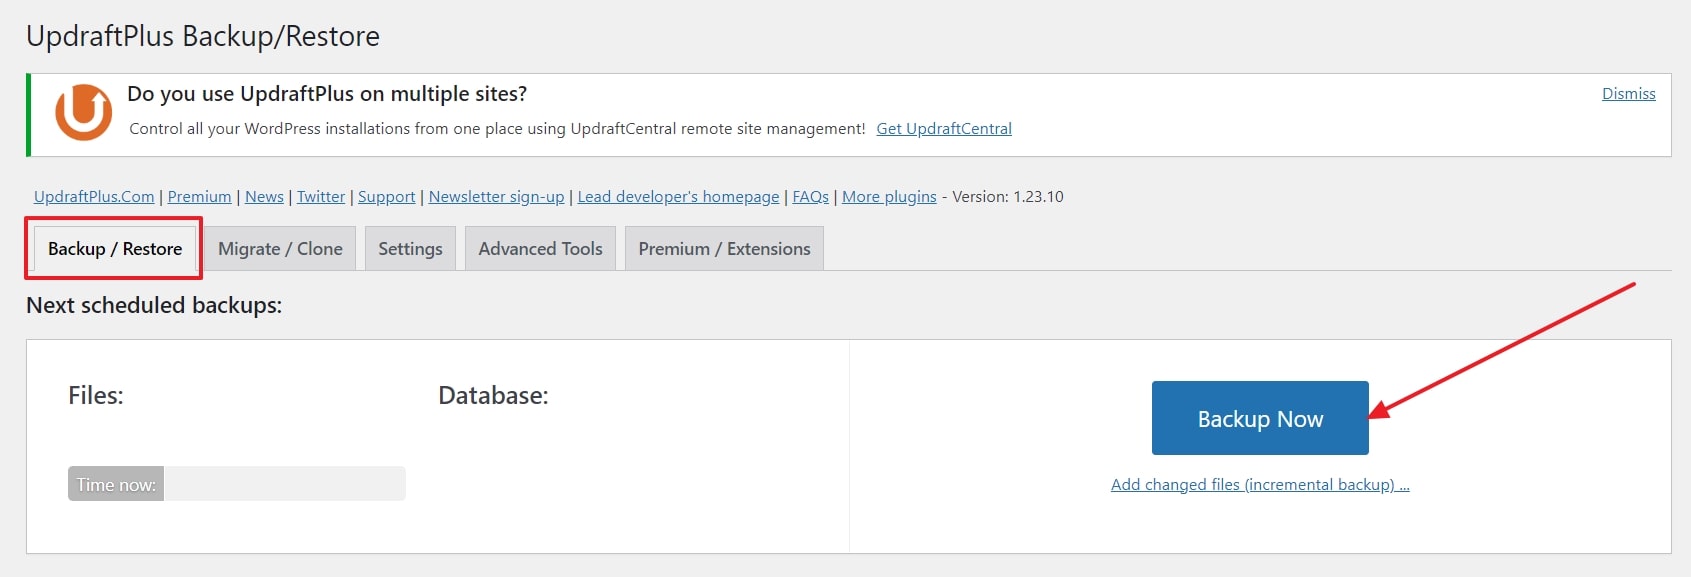
The backup process will now begin and you will receive an email once it is done.
Once the backup is completed, you can head over to your Dropbox account to make sure that the backup files have been properly saved. You will find the files inside this folder: Dropbox >> Apps >> UpdraftPlus.
And that’s it! From here, UpdraftPlus will automatically trigger the backup process to run on the second day, on the third day, and so on and it will retain the latest backup of your website for the last 7 days in your Dropbox account.
I hope you find this guide useful!
If you have any questions or need assistance for your website maintenance related matters, please feel free to get in touch with us!
- Steps To Troubleshoot Emails Not Sending From Your WordPress Website - August 25, 2023
- 5 Things To Look Out For When Choosing a WordPress Maintenance Service Provider! - August 25, 2023
- How To Backup Your WordPress Website (Step-By-Step Guide) - June 7, 2023

WebBuddy is all about supporting local business owners to remove the ongoing frustrations that you face in your website maintenance matters. Let us help you to take care of your website so that you can free up time and energy to focus on your business. We believe in running WebBuddy with a human touch and to be the partner that all our clients deeply trust over the long term.
© 2024 WebBuddy LLP. All rights reserved.
